

プログラミングをする場合にはコードを記述するために、コードエディタやテキストエディタを使うことをお勧めしますが、環境を整えるためには少しハードルが高いと言えます。
まずは簡単に始められるjupyter notebookを使ってプログラミングを始めましよう!
jupyter notobookとは

JupyterLab は、ノートブック、コード、データ用の最新の Web ベースのインタラクティブ開発環境です。柔軟なインターフェイスにより、ユーザーはデータ サイエンス、科学計算、計算ジャーナリズム、機械学習のワークフローを構成および調整できます。モジュール設計により、拡張機能を使用して機能を拡張および強化できます。
jupyter notobookの利用方法
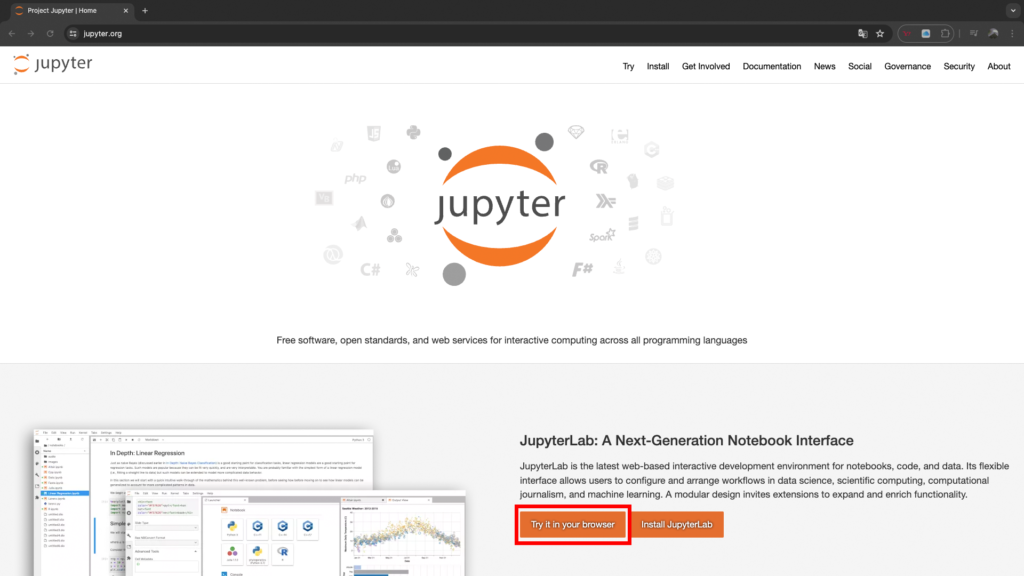
以下をクリックしjupyterのサイトにアクセスしてください。
①「Try it in your browser」をクリック
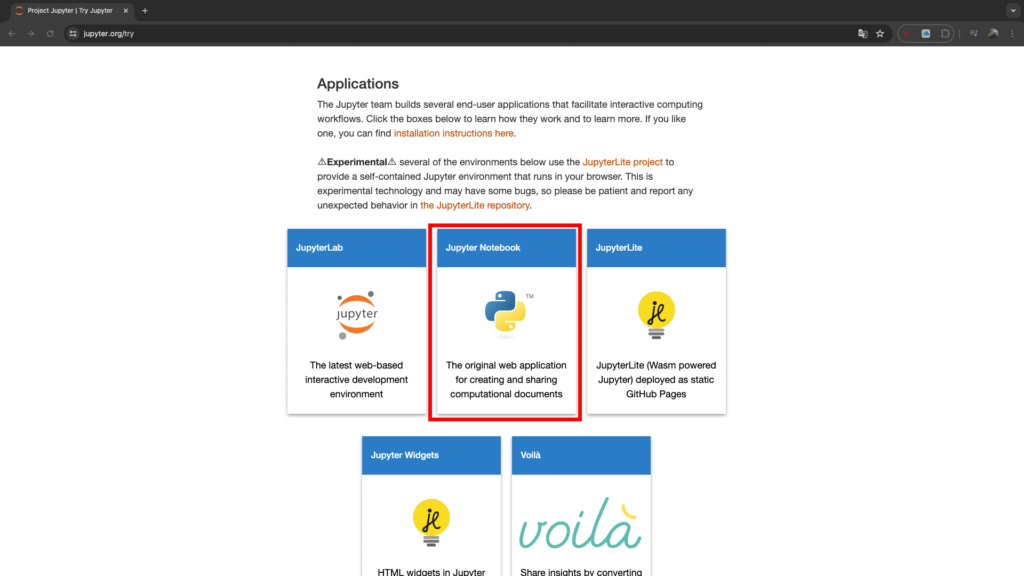
②「Jupyter Notebook」をクリック
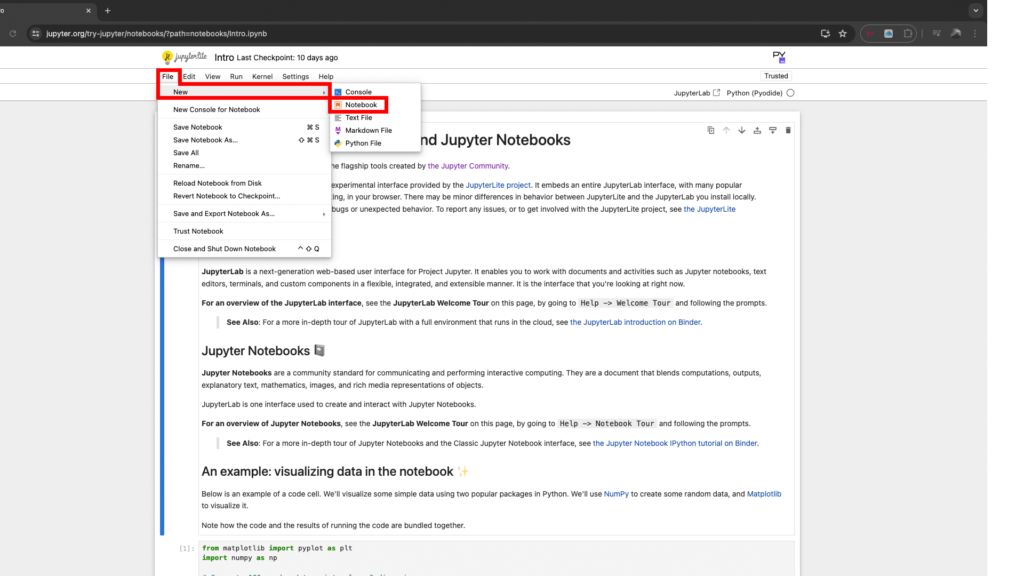
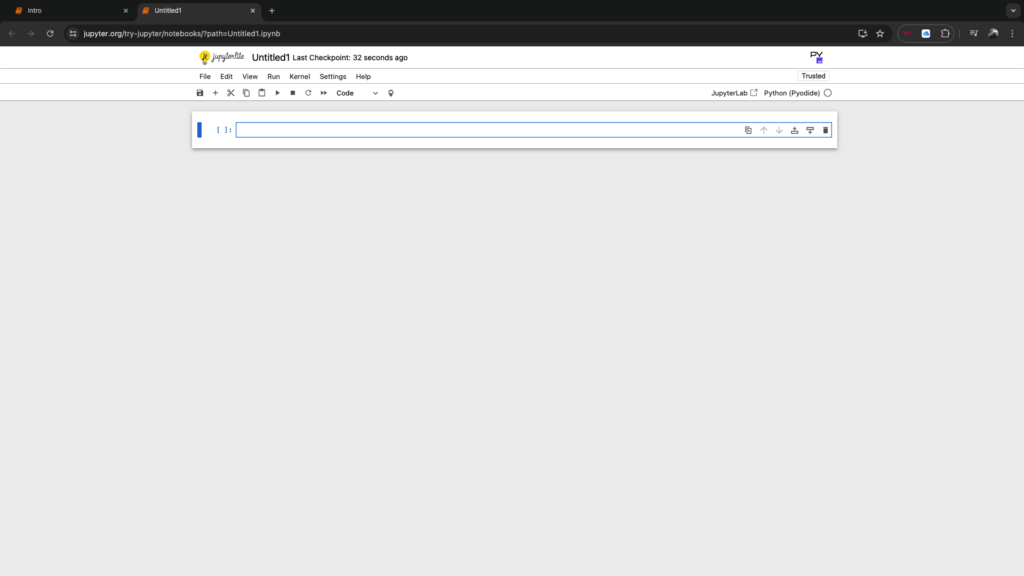
③下記画面に遷移します。

④「File」>「New」>「Notebook」を選択します。
⑤Select Kernelで「python(pyodide)」を選択し「Select」をクリックします。
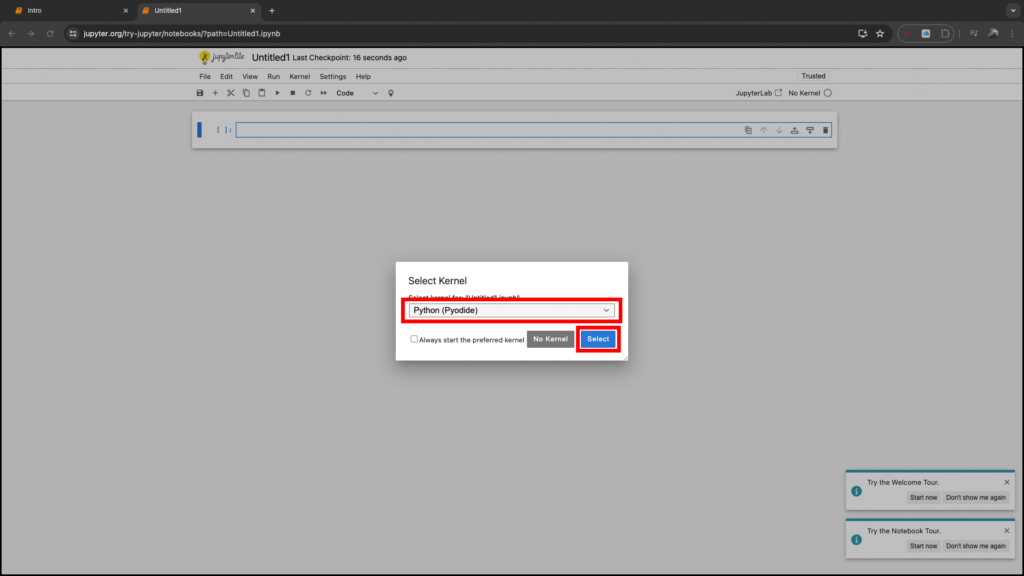
⑥これで準備は完了です。
jupyter notobookを早速使ってみましょう
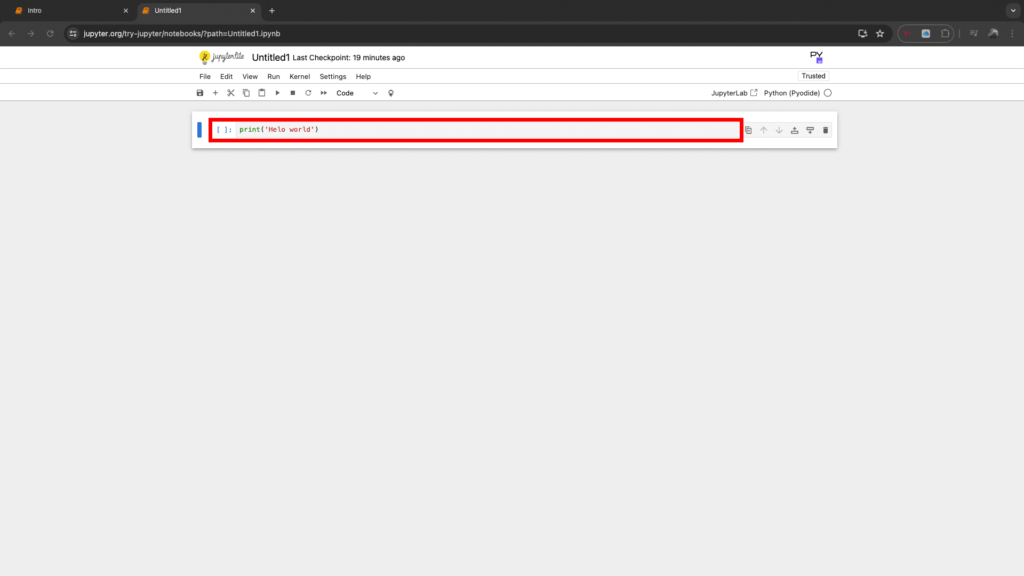
先ずはプログラミングの第一歩である「Helo world」を表示させるコードを記述します。
コードを記載する赤枠に「print(‘Helo world’)」と入力してください。
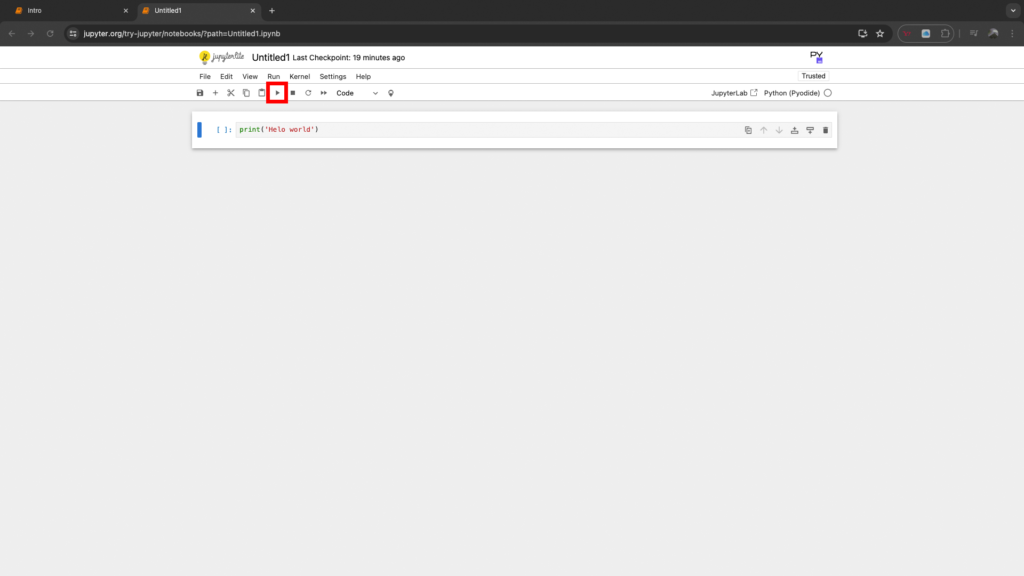
上部「▶️」ボタンを押すか「shft+enter」でプログラムを実行してみてください。
コードの下に「Helo world」と表示されたはずです。
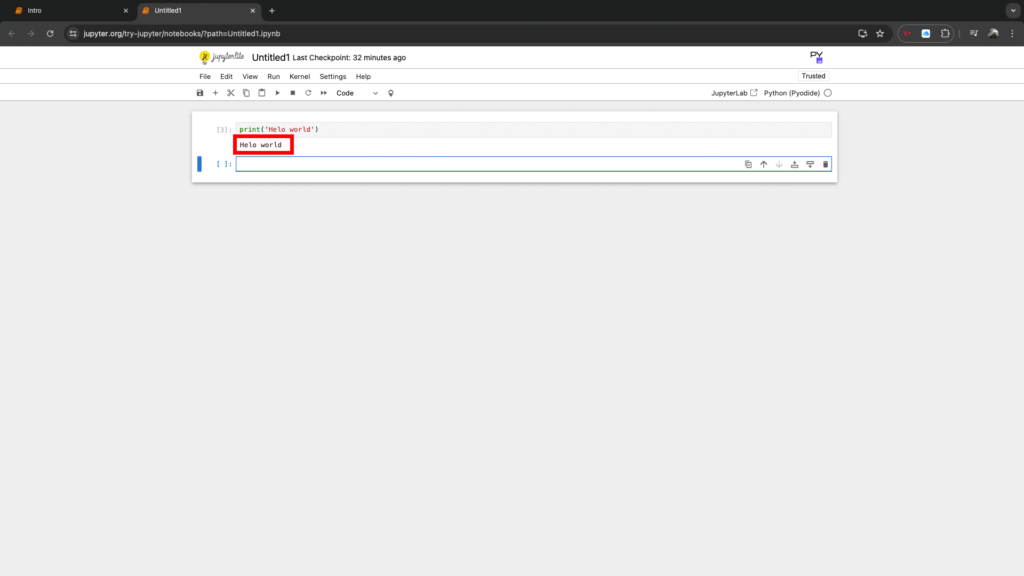
「print」関数はpythonの標準関数で、デスプレーに結果を出力するための関数です。
もし、エラーなどそれ以外が表示された場合は記述したコードを見直してください。これもまたプログラミングでは重要なことです。
間違いを見つけ修正することはデバッグと呼びます。誰しもが全て正しいコードが書けるわけではありませんので、必ずデバッグがあることを覚えておきましょう。
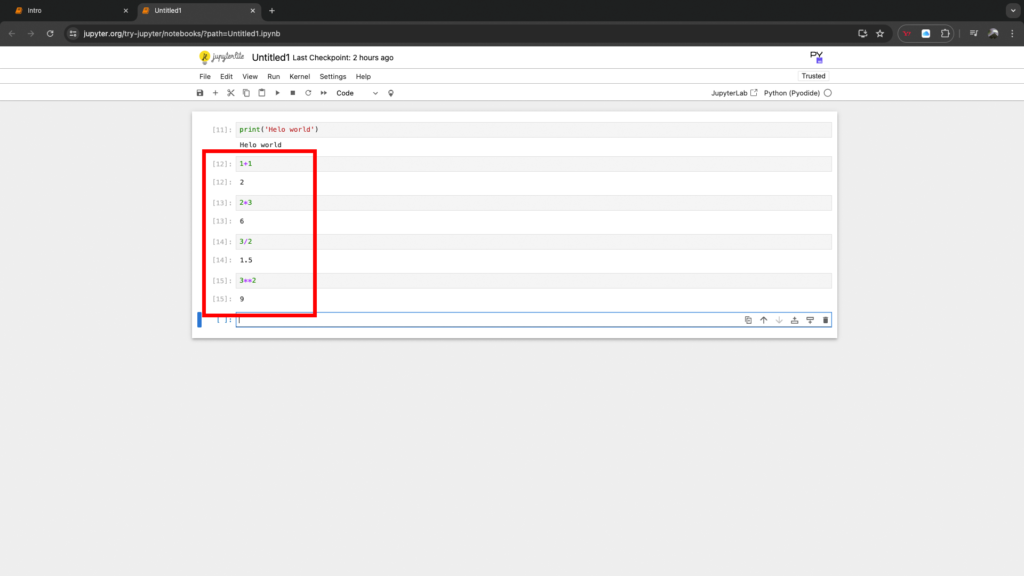
四則演算をしてみましょう
「1+1」「2*3」「3/2」「3**2」などを入力し実行してみてください。
計算結果が表示されるはずです。
四則演算の演算子は別に説明をします。
初めの一歩のpythonコードを実行してみましょう
ここでは環境に依存した部分(日本語フォントなど)を除いた以下のコードで実行します。
※jupyter notebookでは環境を作るのが難しいのでここでは省略します。
import matplotlib.pyplot as plt
import numpy as np

# xの範囲を設定
x = np.linspace(-10, 10, 400)
# yの値を計算
y = x + 1

# グラフの作成
plt.figure(figsize=(8, 6))
plt.plot(x, y, label="y = x + 1 Graph")
plt.title("y = x + 1 Graph")
plt.xlabel("x")
plt.ylabel("y")
plt.axhline(0, color='black', linewidth=0.5)
plt.axvline(0, color='black', linewidth=0.5)
plt.grid(color='gray', linestyle='--', linewidth=0.5)
plt.show()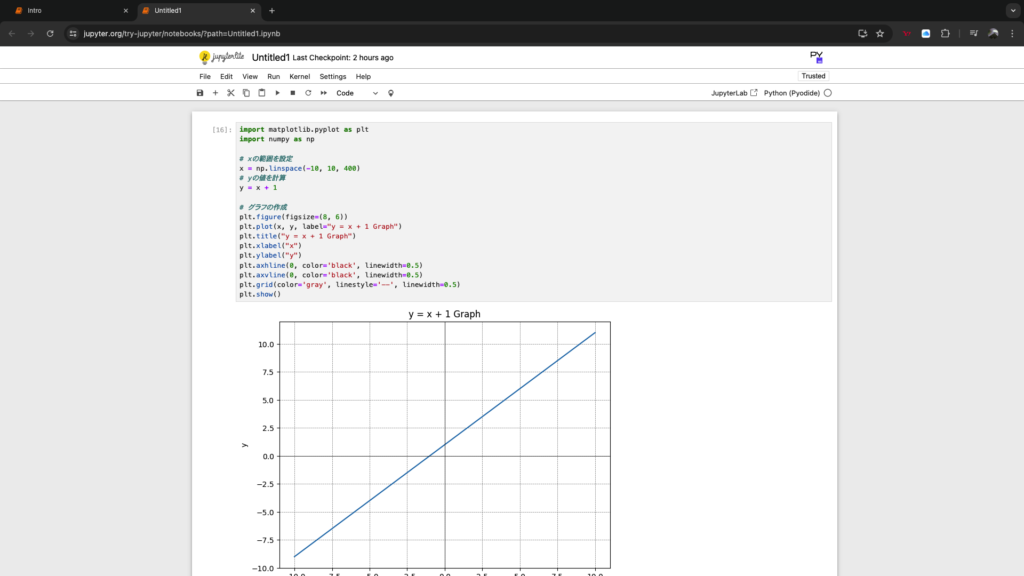
上記のような結果になりました。
あとがき
いかがだったでしょうか。
案外簡単にコードが書けたのではないでしょうか?
「jupyter notebook」の他にも「Google colabo」などパソコン上に環境を作らずにコードを書いて実行できるものがあります。先ずはそこで関数や動作などを練習すればプログラミングに慣れてくると思います。